The Polar Coordinates filter in Photoshop may be one of those filters that you rarely use, in part because even though you might have a rough idea what it does (transform your image in a circle), it can be difficult at first to understand its exact behavior.
The best way to understand the Polar Coordinates filter (found in the Filter > Distort menu) is to apply it to an image specifically designed to see exactly what it does, and compare both side by side. So that’s what I did for this tutorial.
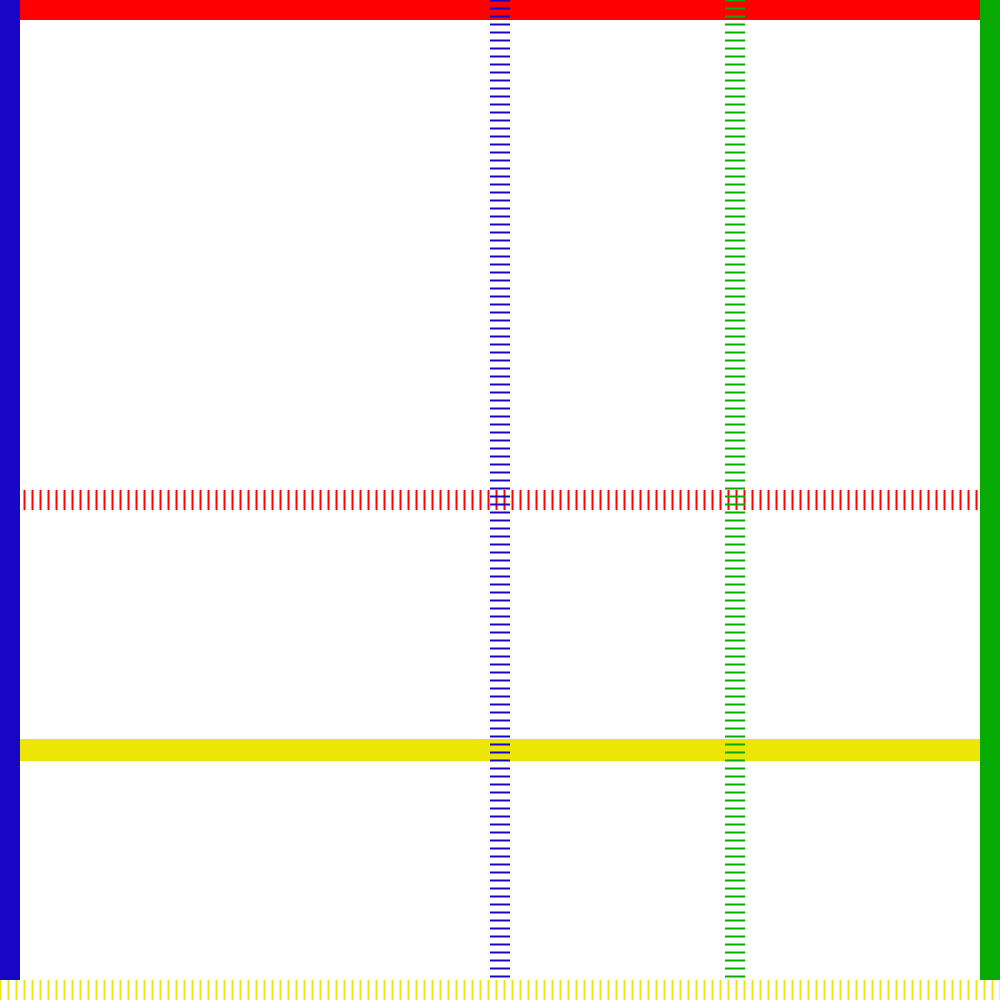
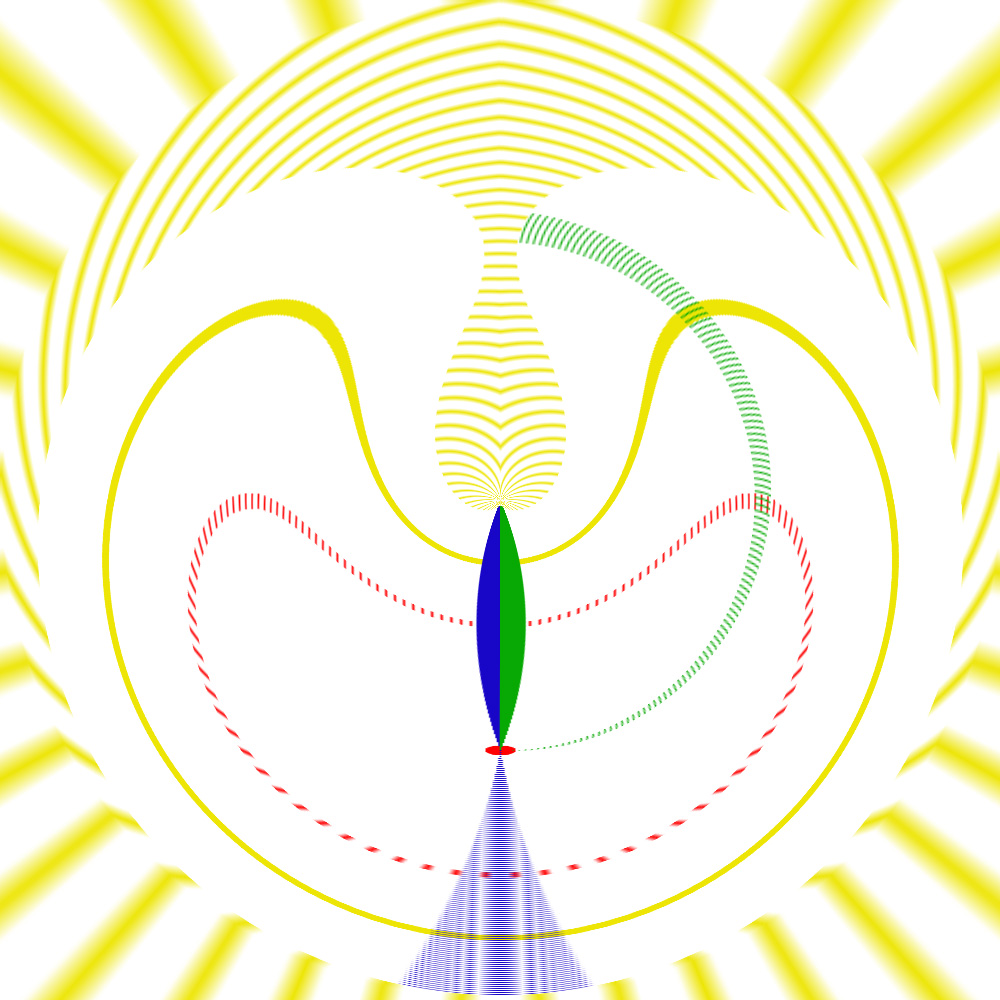
In the following image, all lines are different to make it easy to match the effect of the filter with the original:
The Polar Coordinates filter has only 2 settings: rectangular to polar, and polar to rectangular. When applying rectangular to polar, it transform our square shape to a circle, as expected:
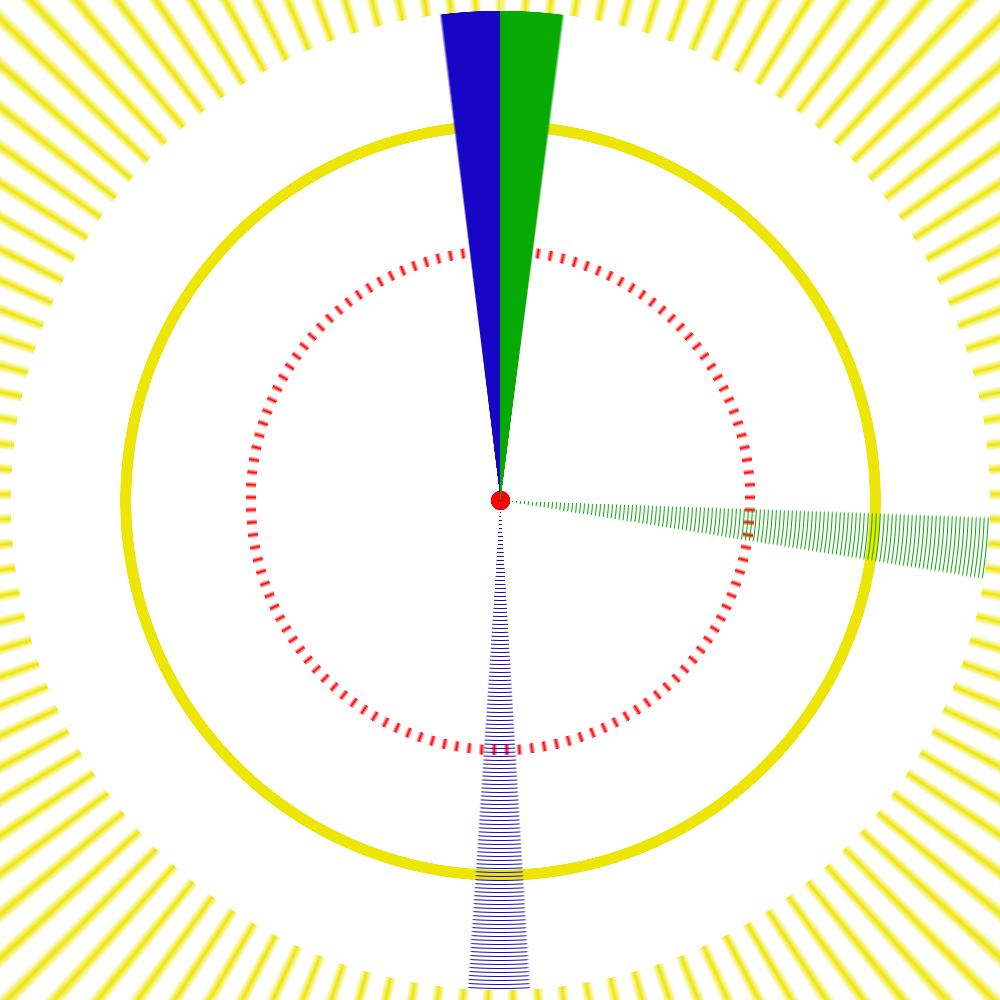
It is now easy to understand the basic effects from that filter:
- The top-middle pixel from the original becomes the center
- The horizontal lines become circles, their radius becoming greater as they go from top to bottom in the original image.
- The very last pixel row in the original is stretched to fill the full square in the result image. In this example, if the dotted and solid yellow lines had been inverted, the square corner would be completely filled with yellow, instead of rays.
- The vertical lines become radiuses of the circle, or rather slices, since the center is a single pixel wide and then it is stretched as it goes towards the outer edge. If the vertical lines hadn’t been from top to bottom, they would have resulted in only partial slices, with pieces missing near the center and/or outer edge.
- The left pixels in the original are at the top-radius of the circle, and from left to right in the original to counter-clockwise in the circle.
- The horizontal lines’ widths and vertical lines’ lengths are halved.
If we did apply polar to rectangular to that image, we’d be back to the original.
So, instead, let’s play a bit with the filter and let’s try differen scenarios. In all examples, the starting point is the original image, to which the mentioned filters sequence is applied.
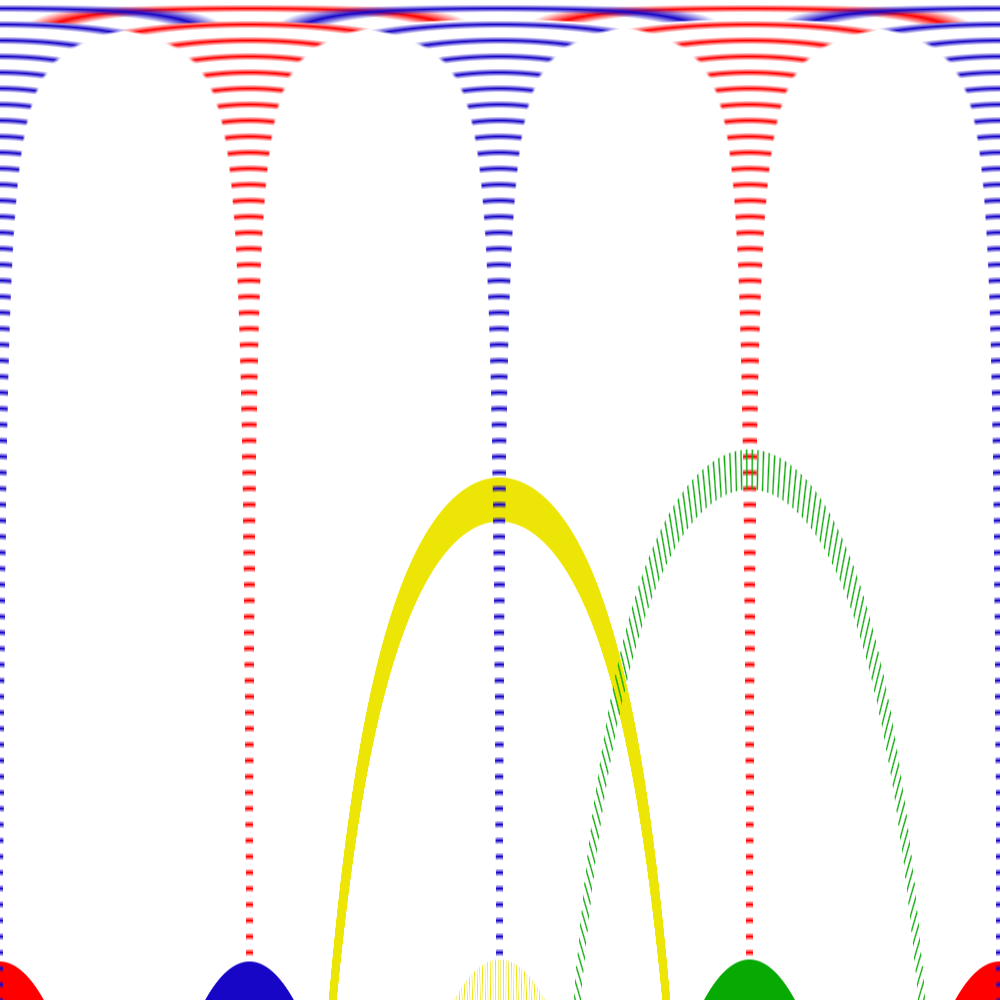
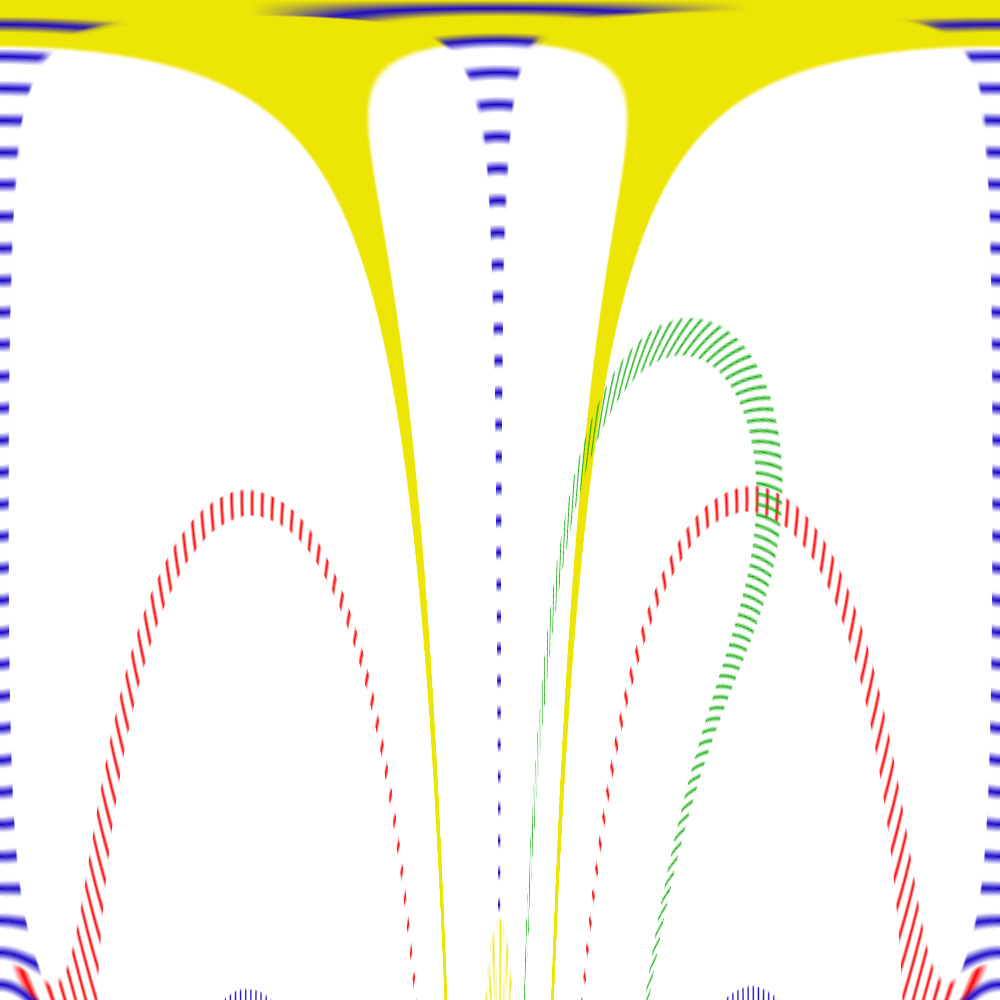

As you can see, going beyond the obvious one-time effect of the Polar Coordinates filter, you can quickly get quite interesting shapes when applying it more than once in a creative way. And you’re not limited to 2D! I can see in those some shapes which would probably look very nice in 3D as well, when extruded.
The bottom line is, just play around with that filter and see what you can come up with. Maybe you’ll find shapes that you’ll use in future projects.
I would recommend having distinct original shapes in layers, so you can easily extract only the ones you need, and hide those you won’t keep. Also, working with smart layers makes it easier to turn the filters and other modifications on and off, especially when you use it multiples times, so you don’t have to start again at the beginning for each variation.