The library is the basis for the organization of your pictures and therefore is, in my opinion, Lightroom’s most important module.
Folders and collections
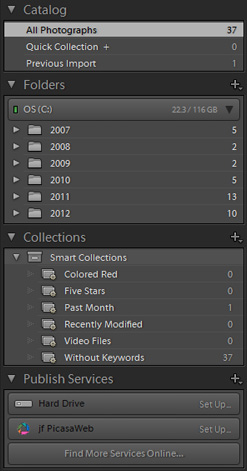
The top of the left panel contains some of the catalog’s general information, such as the total number of pictures or how many were added during the last import.
Below that is the list of folders that indicates the location of the pictures on the hard drive. It is possible to create and delete folders, as well as rename them. They can also be moved by clicking and dragging them to the target folder.
All of the changes made to the folders in Lightroom will be reflected on the hard disk, just as if you made them from Windows explorer or another similar application.
Next are the collections, which are used to group pictures in albums, either manually (you choose the pictures) or automatically, in which case smart collections are created, based on certain criteria (color, metadata, etc…). Files are not duplicated when they are added to a collection; instead, shortcuts to the original pictures are created. Thus, if for instance you crop an image or give it keywords, those changes will also be visible in the collection that contains the picture. It is also worth mentioning that a single picture may be added to many collections.
You can create a collection through the + icon at the right of the title and then drag and drop pictures to add them. When working with a smart collection, you’ll have to add one or multiple conditions that the pictures will have to meet in order for them to be included in it.
It is also possible to create collections sets in order to manage them more easily.
The publish servicesallow you to export pictures to the hard disk and online, including on Facebook and Flickr.

Quick Develop
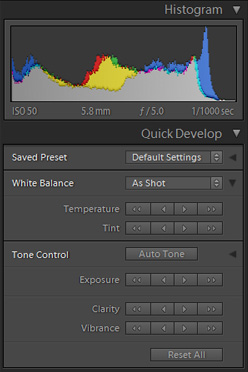
The develop module offers numerous options to improve your pictures, but sometimes you only need to make small color adjustments. The Quick Develop section of the right panel allows you to do just that, with the help of the histogram, as well as apply existing presets.

Keywords and metadata
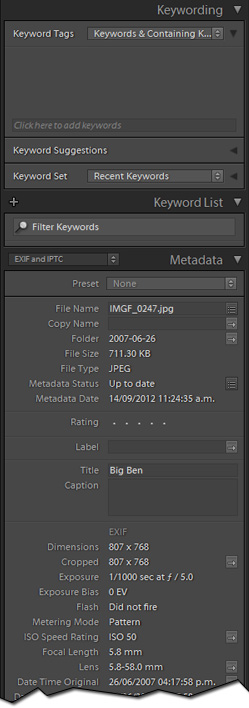
The keywords and metadata (from the camera as much as that defined by the user) are very important. Indeed, although it is not that difficult to find specific pictures among a few hundreds, when you have to work with thousands or tens of thousands of them, keywords and metadata make the difference between finding what you are looking for in a matter of seconds and dedicating a lot of time to that task.
Just as with the other elements of the library, other posts will focus on this subject, but to summarize, metadata contains information saved by the camera (ISO speed, aperture, size and resolution,…) as well as some fields that can be filled with data about who took a picture, where (exact place, city, state and country), title and caption, and much more.
Keywords are used to include even more data that will simplify future searches, such as the objects or names of the people that appear in the pictures, the event type (wedding or birthday, for instance), and so on.
I recommend not adding as keywords information that has its place in the metadata. For example, don’t put the city and country name in the keywords; it’s better to use their respective fields in the IPTC metadata (in the Imagesection), since they can also be used in searches.

Toolbar
The options shown in the toolbar may be chosen through the menu that is displayed when clicking on the arrow at the right. You can also hide the whole toolbar using the menu View > Hide Toolbar or by pressing the T key. If it’s hidden, simply press the T key or use the menu View > Show Toolbar to show it again.
The available options belong basically to one of the following 2 categories:
- Display tools, which let you customize how the pictures are shown: as thumbnails or full size, 2 or more at the same time to compare them, etc…
- The classification tools, used to organize your photos, for instance giving them a color or a star rating.
Filters
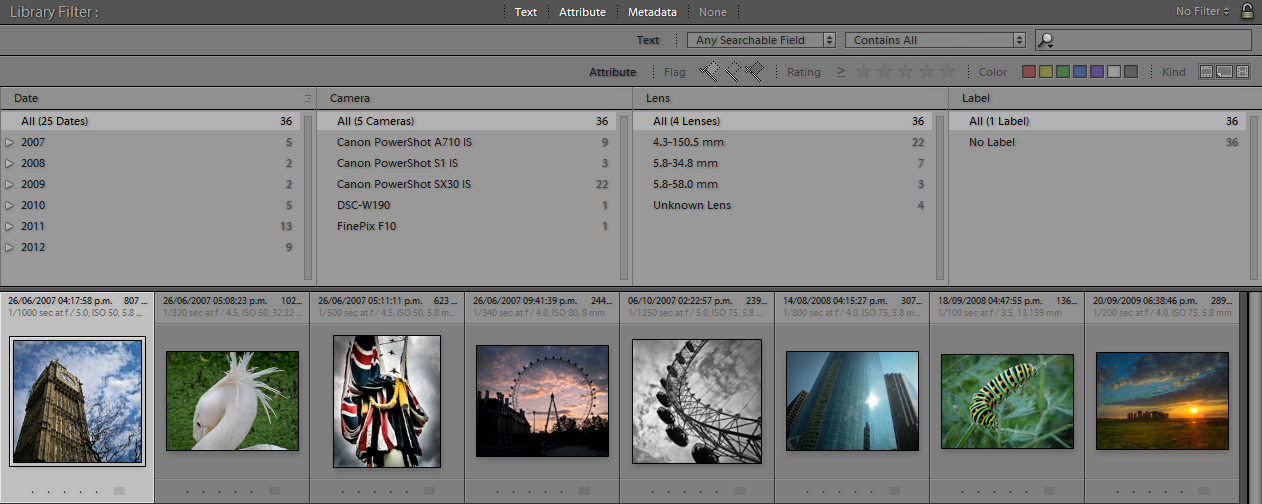
The filters baris located on the top of the screen, only in the grid view. It allows you to find the pictures that match one or multiple search criteria.

The next post of this series will be an introduction to the develop module, with which you’ll be able to greatly improve your pictures in a matter of minutes.
This post is based on Lightroom 4.1; the described interface and functions may be different in other versions.
