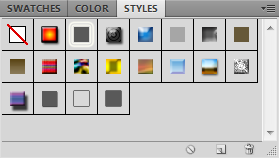
In Photoshop, a Layer style is a group of effects that are grouped together, so that they can be applied all at once. Such effects include shadows, pattern and color fill, strokes and much more.
You’ll find the Styles panel in the tabs group that also includes Swatches and Color. If you don’t find it there or the whole tabs group is hidden, you can select it from the menu (Window > Styles).

Let’s start with a very simple design and create two layers: one with some text and the other one with a rectangle.
You then just have to select the layer and then click on the desired style. That’s it!
In this example, we’ll apply different styles to each layer.
As you can see, once the style is applied, a list of Effects appears just below the layer. You can turn on and off those effects, whether all at once or one by one, by clicking on the eye icon on the left. If you have many layers and do not want to see the effects list, just click on the little arrow next to the fx icon; while the list will be hidden, the style will still be applied.
More styles are included in Photoshop by default, among them Image Effects, Text Effects and Textures. You can access them by clicking on the icon on the right of the Styles tab. Upon selecting a styles set, you’ll be presented with the possibility to replace the current styles or append the new ones, in which case, they’ll simply be added to the existing ones in the panel.
As a final note, keep in mind that those styles can be applied to any layer, no matter whether it is a picture, some drawing with the brush tool or any other content. And the beauty of it all is that you can keep modifying the layer at any time; the style will always adjust to it. To see it in action, change the text or font size, for instance.
In a next post, I’ll show you how to modify the existing layer styles and, more importantly, how to create your own, custom styles.


